


eBook
Related collections and offers
Overview
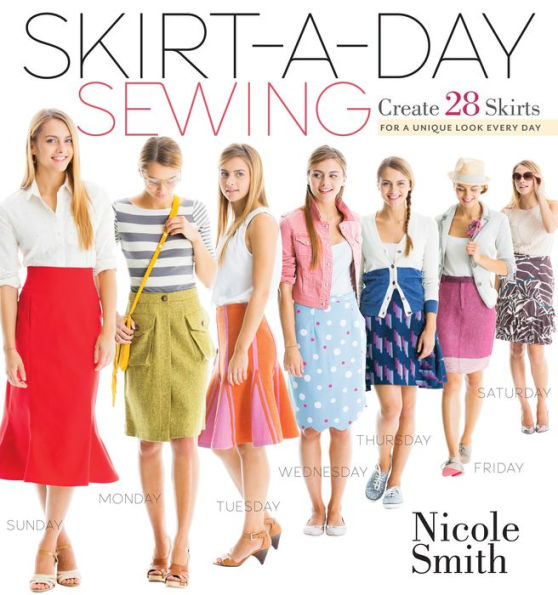
Design and sew your own fabulously stylish skirts. In this fun guide, Nicole Smith shows you how to draft a pattern for a custom fit and shape it into one of four basic silhouettes: wrap, straight, flared, and high-waisted. Each skirt can then be easily redesigned into seven distinct looks — one for each day of the week. Suitable for beginners and expert sewers alike, Skirt-a-Day Sewing will inspire you to express your unique personal style as you stitch up great new pieces for your wardrobe.

Product Details
| ISBN-13: | 9781612122458 |
|---|---|
| Publisher: | Storey Publishing, LLC |
| Publication date: | 07/03/2013 |
| Sold by: | Hachette Digital, Inc. |
| Format: | eBook |
| Pages: | 240 |
| Sales rank: | 635,851 |
| File size: | 19 MB |
| Note: | This product may take a few minutes to download. |
About the Author
Nicole Smith moved from Texas to Brooklyn, New York, where she teaches sewing workshops, private lessons and classes at 3rd Ward. She is part of the Etsy marketing and merchandising team and designs clothing, jewelry, accessories and sewing patterns. She is a regular contributor to Stitch magazine and has also written for Seventeen, Teen People, Cutting Edge, Adorn, SewStylish, CraftStylish, and Threads.
Read an Excerpt
CHAPTER 1
GEAR UP
Are you ready to start creating your own skirt designs? Whether you're new to sewing and patternmaking or returning after time away, this chapter will explain the supplies you'll need to design and create your own clothes.
One of the best things about design and sewing is that you don't need a lot of expensive tools and equipment to get started, but there are a few things you should have on hand to help get the job done. Before you make your first fabric cut, read this chapter to determine if there are any sewing and patternmaking tools you might already have. Then make a list of the things you want to purchase before you start, and a list of the items that would be nice to have, but can wait awhile.
Take the time to stock up your sewing and patternmaking kits because successful sewing starts with the right tools.
SEWING TOOL KIT
Stock up on the essentials
The following is a list of the tools I consider essential and like to keep on hand in my sewing room. Dull scissors and pins can damage fabric, but it's not important to purchase expensive new scissors or fancy sewing tools if you already have some that work well. It's easy to be overwhelmed by the selection of gadgets at your local sewing store, so keep your budget in mind while shopping and stick to your list.
Bobbins. Make sure you are using the right type and size bobbin for your sewing machine (check your manual or call the manufacturer). Using the wrong bobbin can cause serious damage to your machine. Keep several on hand.
Embroidery scissors or other small scissors. These help you make small cuts and snip into tight places where traditional shears can't reach. They are typically about 4" long and have two sharp points.
Fabric shears. Invest in a good pair of fabric scissors and use them only to cut fabric or you'll dull the blades. Shears are between 7" and 8" long and have bent handles with different size holes for the thumb and the fingers.
Hand-sewing needles. Keep an assortment on hand to accommodate various fabrics and threads.
Iron and ironing board. Good pressing is essential for fine sewing, so investing in a good iron and a sturdy ironing board will save you time in the long run. Look for an iron with easily adjustable heat and steam settings. For more on pressing tools, see page 19.
Machine needles. There are many different type and size sewing machine needles for all the different fabric fibers and weights. See Machine Needle Sizes and Machine Needle Types on the next page.
Pins and pincushion. Straight pins should glide easily through fabric without much effort. If your pins are dull and you have to apply pressure to pierce the fabric, replace them to prevent any fabric damage. Keep a pincushion nearby for easy access to your pins.
Presser feet. Presser feet hold your fabric steady and guide it under the needle and through your machine. Consult your manual for how to install presser feet and what types fit your machine. Most machines come with all of the presser feet you need to create the designs you'll find in this book. Check to make sure you have a general-purpose foot, zipper foot, piping foot, and buttonhole foot. Some extra feet that you might find helpful include an invisible-zipper foot that makes sewing invisible zippers a breeze, and a straight-stitch foot that will help you sew sheer fabrics without rippling.
Seam gauge. This is a small ruler for measuring seam allowances and hems.
Seam ripper. We all make mistakes. Fortunately, a seam ripper can help undo most stitching mishaps. Seam rippers should cut thread easily. If you find yourself pushing hard to break stitches, it's time to replace the ripper.
Temporary fabric marker. There is a variety of fabric-marking tools, including chalks, water-soluble markers, and air-soluble pens. Always test your marker on a fabric scrap to make sure the markings are entirely removable before using it on your garment pieces.
Machine Needle Sizes
Sewing machine needles are often sold in packages with a variety of sizes, since you need different size needles for different fabrics. The needle size is indicated on the package and typically includes two numbers. The higher the numbers, the larger the needle. The first number is the needle shaft's diameter in millimeters. The second number is its U.S. standard size. Choose the needle to best suit your fabric, so that it glides easily through the fabric layers and makes smooth, even stitches.
Fine silks and sheer fabrics: 60/8
Lightweight fabrics: 70/10
Medium-weight fabrics: 80/12
Medium- to heavyweight fabrics: 90/14
Heavyweight fabrics: 100/16
Upholstery fabrics: 110/18
Machine Needle Types
Other than the needle size, you also need to select the correct type of needle.
Ballpoint needles are used with knit fabrics because they have a rounded tip to glide past the fabric's fibers, as opposed to piercing through them.
Denim needles are heavy duty with a sharp tip to allow for easy stitching through thick fabrics such as denim, vinyl, upholstery, and canvas.
Embroidery needles are made especially for machine embroidery and embellishment techniques.
Leather needles have a wedge-shaped point to help them pierce leather and suede.
Metallic needles may seem best for sewing metallic fabrics, but they are really made for use with metallic threads.
Sharp-point (Microtex) needles have very sharp points to stitch flawlessly through silks, microfibers, fine cottons, and other woven fabrics.
Topstitching needles have a larger eye to accommodate thicker topstitching threads. They're also strong enough to pierce multiple layers of fabric.
Universal needles are standard and suitable for sewing most projects, especially those made of medium-weight fabrics.
PRESSING TOOL KIT
Key items for precision ironing
In addition to your iron and ironing board, there are a few other tools that will help with effective pressing. If you only invest in one extra pressing tool, make it a press cloth, but the other items listed here will help you shape flat fabric into a three-dimensional garment.
Clapper. A clapper is made from wood and is used to flatten fabric after it has been pressed. It's great for setting hems and pleats in place. To use, quickly apply the clapper over the pressed area and apply pressure. The clapper will absorb heat and moisture from the fabric, setting the press perfectly in place. Apply firm pressure with the clapper for a crisp finish.
Point presser. This tool is great for pressing small areas such as collar points and waistband corners. It's not so sharp that it will poke through fabrics and it's iron-safe so you can press over it.
Press cloth. A press cloth is used between your fabric and your iron. It protects your fabric from the iron's direct heat, preventing fabric damage such as unwanted shine and impressions from seam allowances.
Tailor's ham. A tailor's ham is a firmly stuffed pillow that is shaped like a ham. Traditionally, it is stuffed with sawdust, making it firm. It is used to press curved seams, darts, and other curved garment details because it mimics the body's natural curves.
PATTERNMAKING TOOL KIT
What you need to have on hand
When you start designing your own patterns, there are a few tools that are worth the investment. Some of them might be a little pricey; however, they last for years. If you have trouble locating them at your local chain fabric stores, check online for greater selection.
Awl. Use an awl to mark points on your pattern, such as the ends of darts, buttonholes, and pocket placements.
Clear tape. Keep a roll of clear tape around to mend any accidental cuts in your pattern and for certain patternmaking techniques.
Curves. There are many curved rulers available. I recommend using a vary form or hip curve for drafting skirts. Some manufacturers make larger French curves that will work as well.
Drafting or patternmaking paper. Paper — available in large sheets or rolls — is necessary for most patternmaking, for tracing pattern pieces, and for certain techniques such as slashing and spreading.
Eraser. Keep a large eraser on hand to delete any marking mistakes.
Gridded pattern paper. This pattern paper is printed with a 1" grid to help with measuring and squaring design lines.
Marking tools. Mechanical pencils, because they are precise and erasable, work well, but marking tools are a personal preference. It does help to gather a few pencils and pens in various colors to mark things that need attention.
Measuring tape. A measuring tape is flexible to allow for taking body and dimensional measurements and for measuring curved pattern pieces.
Notcher. This tool isn't necessary, but it's handy to have in the sewing room. It quickly cuts a ¼" x 1/16" notch into the paper, which works well for marking pleats, darts, seam allowances, and more.
Paper scissors. Keep a pair of scissors separate from your fabric scissors for cutting paper, tape, and more. Go ahead and label them so you don't mix them up.
Pushpins. When altering patterns flat on the table, pushpins help you pivot the paper on the table. Just make sure you put down either a cutting mat or a piece of cardboard to protect your work surface.
Spiked tracing wheel. A spiked tracing wheel resembles the tracing wheels you traditionally see in the fabric store. This version, however, has pointy spikes along the wheel to help you trace around designs and transfer them to paper quickly and easily.
Transparent ruler. A transparent ruler with 1/8" grids printed on it works well for most measuring jobs and is flexible for measuring curves.
CHAPTER 2
CONSTRUCTION ZONE
Once you've assembled your tools, it's time to start designing and sewing. In this chapter, you'll learn the basic sewing techniques you'll need to know to assemble your own skirts, starting with selecting the right fabrics. You'll also learn how to apply interfacing, press correctly, and finally, how to stitch like a pro.
FABRIC KNOW-HOW
Navigating the material world
The wonderful world of fabrics is gorgeous; it boasts of silks, brocades, sateens, tweeds, metallics, and much more. However, before you venture out into the material world, make sure you know what you're looking for. The selection can be overwhelming, but with a little bit of fabric knowledge under your belt, you're sure to make the choices that will get you just the look you want.
Identifying Woven and Knit Fabrics
This book focuses on creating skirt patterns specifically for woven fabrics, so for the techniques demonstrated, knit fabrics will not work. Knits are stretchy and generally require different methods of pattern drafting and sewing. Woven fabrics are traditionally not very stretchy (unless they are made with stretch fibers, such as Lycra), and use techniques, such as darts and gathers, to shape a garment to contour around body curves.
If you're unsure in the fabric store whether the fabric you are considering is knit or woven, take a closer look. A knit is made from looping one continuous yarn around itself. Usually you can spot the loops upon closer inspection. A woven fabric is made from multiple threads that are woven together in a variety of patterns.
Prepping Your Fabric and Interfacing
Before you cut out your fabric, wash and dry it the same way you want to wash and dry the finished garment. If you make your garment from unlaundered fabric, you run the risk of it shrinking and distorting in the wash.
Press your fabric to remove all creases and wrinkles before cutting it.
It's also beneficial to prewash interfacing because it can shrink at a different rate from the fabric and then distort the garment pieces. Even fusible interfacing should be prewashed. To do this, soak your interfacing in a bowl of warm water until the water cools down to room temperature. Then lay out the interfacing on a flat surface to air-dry. For more on interfacing, see page 27.
Understanding Grain
Grain is the direction of the threads or yarns in woven fabrics, and it dramatically influences the drape and fit of your garments. It's important to understand how it works.
Woven fabrics have a lengthwise grain, crosswise grain, and bias direction.
It's very important to decide which direction you want to cut your pattern pieces and mark them accordingly. Typically the long arrow on a pattern refers to its "grainline." The pattern is positioned on the fabric with the arrow parallel to the selvages, so it is the arrow placement on the pattern that determines the grainline of the cut fabric.
A: The lengthwise (or straight) grain runs parallel to the fabric's selvage (finished edge). There is little or no stretch on the lengthwise grain.
If the arrow runs up and down the pattern piece, parallel to either the center front or the center back of the garment, the garment is cut on the straight grain. Most pattern pieces are cut this way.
B: The crosswise grain runs across the fabric from selvage to selvage. There is a small amount of give, or stretch, along the crosswise grain.
When the arrow runs across the pattern, the pattern is cut on the cross-grain and will stretch slightly.
C: The fabric bias is a 45-degree angle from the selvage. Fabric has the most stretch along its bias.
If a pattern's grainline arrow is angled so that the pattern will be positioned on the bias, the garment will cling closer to the body and have a very fluid drape.
Mark the desired grainline on all your pattern pieces before cutting them from fabric. Of course, it's up to you which direction you want to cut out your pattern pieces. In the Block Party Skirt on page 138, the striped fabric is cut in different directions to create an original motif.
Cutting Fabric
Make sure you cut out your garment pieces using the correct grain. If the grainline is off, the drape of your garment can shift and hang incorrectly on your body.
To pin your pattern pieces on the desired grain, make sure the grainline arrow on the pattern is equidistant from the fabric selvage throughout the length of the pattern. Measure and pin the grainline to the fabric first and then pin the rest of the pattern, smoothing the pattern as you pin.
Marking the Fabric
Once you have your pattern pieces cut out, it's time to transfer the important construction marks from your pattern to the fabric. This includes any registration marks or sewing lines, such as darts, or pocket and zipper placements. Make sure you test your marking tools on a scrap of fabric first to make sure you can remove the marks later (you don't want to accidentally stain your garment before you even wear it). Feel free to use any marking tool that feels comfortable to you, shows up on your fabric, and won't be visible from the right side of the completed garment.
PRESSING MATTERS
Getting the best results from your iron
Great sewing starts with precise pressing. When making a garment, you'll spend about the same amount of time at the ironing board as you will at the sewing machine. Pressing can make the difference between a garment that looks handmade and one with a professional finish.
Pressing your garment during construction isn't quite like ironing a garment to wear. Pressing is an up-and-down motion that helps set your stitch with pressure, heat, and sometimes steam. Ironing, which is the moving of the iron back and forth across the fabric, might distort or stretch new seams. So, don't move the iron across your stitches and fabric; instead, set your stitch with a press.
Before touching the iron to your fabric, consider the fiber content and test press a small swatch to make sure the heat-setting doesn't cause any heat damage, such as shrinking, staining, and even melting.
Fibers and Iron Temperature Settings
Acetate, Acrylic High heat can melt these fibers, so a low heat setting with no steam is best. Use light pressure when pressing to avoid permanent creases.
Cotton, Hemp, Linen These fibers can withstand high heat and steam, so crank up the heat setting and use plenty of steam.
Nylon Nylon is synthetic and can melt. Always use a low heat setting and no steam.
Polyester Polyester can usually withstand medium heat settings and some steam. Avoid firm, hot pressing, which can crease.
Rayon Press rayon fabrics with the iron set on a synthetic setting or medium heat with low steam.
(Continues…)
Excerpted from "Skirt-a-Day Sewing"
by .
Copyright © 2013 Nicole Smith.
Excerpted by permission of Storey Publishing.
All rights reserved. No part of this excerpt may be reproduced or reprinted without permission in writing from the publisher.
Excerpts are provided by Dial-A-Book Inc. solely for the personal use of visitors to this web site.
Table of Contents
Introduction
Chapter 1 - Gear Up
Sewing Tool Kit: Stock up on the essentials
Pressing Tool Kit: Key Items for precision ironing
Patternmaking Tool Kit: What you need to have on hand
Chapter 2 - Construction Zone
Fabric Know-How: Navigating the material world
Pressing Matters: Getting the best results from your iron
What's the Deal with Interfacing? The inside story
Hand Stitches: For fine touches a machine just can't handle
Seams Your Way: Join your pieces with style
Adding the Details: Shape your skirts with ease
Closing Time: Sew great-looking closures
The Bottom Line: Master hems for a pro finish
Chapter 3 - Draft Your Own Custom Patterns
Body Measurements: Great patterns start with accurate measurements
Draft a Customized Skirt Sloper: The building block for your own designs
Basic Sloper Design Variations: Get started with designing
Finishing Up: What to add before you start sewing
Using Your Sloper: How to make the skirts in this book
Chapter 4 - Wrap Skirts - Draft the Basic Pattern
Spot On Wrap
Pocket Change
Spring-Loaded Wrap
Double-Time Wrap
Strong Suit
Quick Draw
Frill Seeker Wrap
Chapter 5 - Straight Skirts - Draft the Basic Pattern
Twiggy
Great Scot
High Definition
Block Party
New Wave
Super Fly
Velvet Crush
Chapter 6 - Flared Skirts - Draft the Basic Pattern
Girlie Show
Lone Star
Line-by-Line
Heavy Metal
Piece Gathering
New Twist
Violet Femme
Chapter 7 - High-Waisted Skirts - Draft the Basic Pattern
Jazz Age
Coney Island
French Toast
Happy Hour
Nip and Tuck
Hit the Sack
Tough Luxe